物理租借产品
Odoo 租赁 应用允许用户自定义租借产品的调度、价格和库存。用户可以设置多个取货和投放地点,通过序列号跟踪租借产品。
设置
要配置默认租赁产品,可进入 。
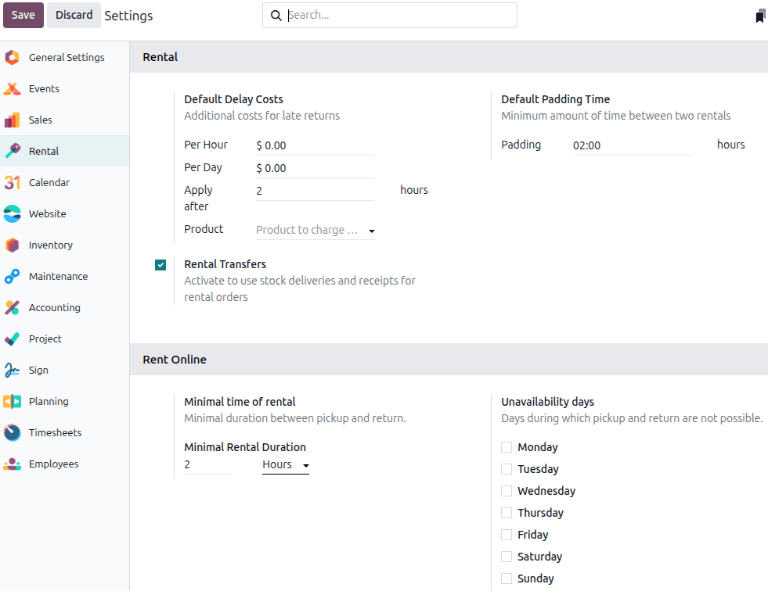
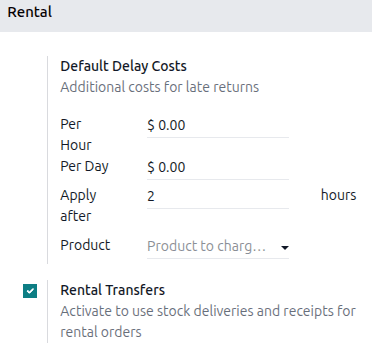
在 租赁 部分,在 默认延迟成本 小节中,填写 应用于 字段。
Note
对于更精细的控制,在产品级别上配置延迟返回的 每小时 和 每天 的成本。如果默认适用于所有产品,请将 产品 字段留空。
在 默认填充时间 部分,填写 填充 字段。下一步,启用 租借转移 。
在 租借在线 部分,填写 最小租借时长 字段并指定 不可用 天数。
点击 保存 来应用更改。
租赁产品
要查看数据库中所有可租借的产品,请转到 。默认情况下,
每个产品看板卡显示产品名称、租借价格、库存数量和产品图片(如果有)。
创建物理产品
要设置新的物理租借产品,请转到 ,然后点击 新建 。在新产品窗口中,默认情况下已选中 租借 复选框。
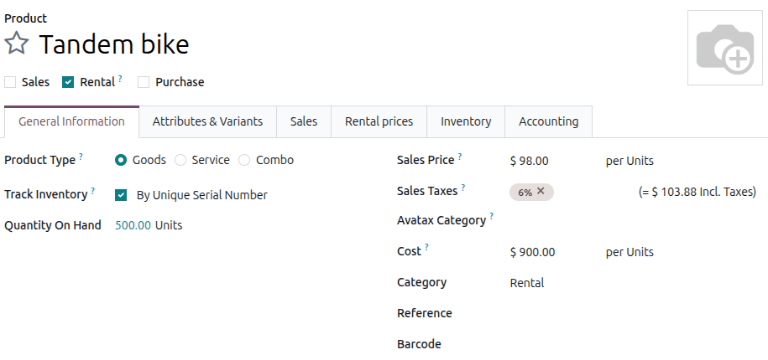
将 产品类型 设置为 物品 ,并选中 跟踪库存 复选框。在 跟踪库存 复选框的旁边,从下拉菜单中选择 按唯一序列号 。对于 类别 字段,从下拉菜单中选择 物品 或通过输入名称并单击 创建 来创建新的类别。
在 价格 部分,点击 添加价格 来输入新的租借价格。在 周期 列中选择 租借期间 (租借期间的单位),或者通过输入名称并单击 创建并编辑 来创建新的租借期间。
Note
创建新的租借期间将打开 创建期间 窗口。填写 名称、持续时间 和 单位 ,然后单击 保存 。新的租借期间自动应用。

在特定 期间 中输入 价格 。要将配置的租借价格应用到现有价格列表,请单击 价格列表 列并选择所需的列表从下拉菜单。
在 预订 部分,填写 每小时罚款、 每天罚款 和 预订产品 时间。这些值自动从 默认延迟成本 部分填充,前提是已配置在 中。
点击顶部附近的 (手动保存) 图标以保存。
Example
只有自行车租借业务才在当地的公园two小时租借 tandem 自行车。tandem 自行车的每小时租借价格是 $20,但既然 tandem 自行车很受欢迎,他们希望设置固定的价格是 $35。为了确保该业务在按时返回自行车,他们将延迟返回费用设置为每小时 $20 和每天 $160 ($20 x 8 小时)。
通过导航到 创建新的租借期间。点击 新建 并配置 2 小时的期间。
导航到 tandem 自行车产品,并转到 租借价格 选项卡,并添加 2 小时的期间 $35。手动保存以应用更改。

创建租借订单
要创建 租借 应用程序中的租借订单,请导航到 ,并单击 新建 。这样做会显示一个空白的租借订单表单。
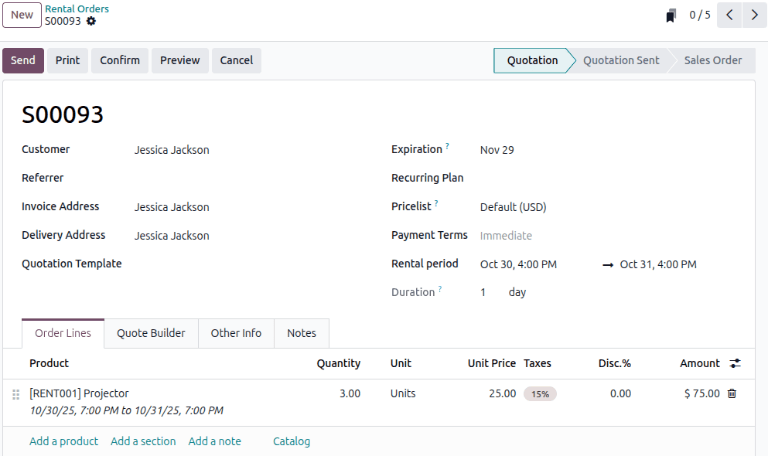
首先添加一个 客户 字段,然后在 租赁期 字段中配置所需的租赁期限。
要调整租借持续时间,请单击 租赁期 字段中的第一个日期,并选择要表示租赁持续时间的日期范围和时间,从出现的弹出日历表单中选择。

完成后,在弹出的日历表单中点击 应用 。随后,弹出窗口消失,租赁的指定时间段将显示在 时长 字段中。
然后,在 订单行 标签中点击 添加产品 ,选择要添加到表单中的租赁产品。
Note
如果在正确配置 租赁期限 字段*之前*添加了租赁产品,用户*仍可*调整 租赁期限 字段。
选择要表示租赁持续时间的日期范围,然后单击 更新租赁价格 字段中的 更新租赁价格 。

这样会弹出一个 确认 窗口。如果一切无误,请单击 确认 ,Odoo 会相应地重新计算租赁价格。
一旦所有信息都正确地填写 Rental 订单表单,请单击 发送 发送报价给客户,当客户确认报价时,请单击 确认 来确认订单。Rental 订单上显示 取货 横幅。
创建发票
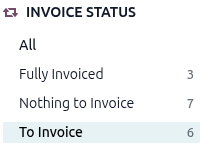
导航到所需的发票,方法是导航到 租借 应用程序并转到 租借订单 仪表板,在 发票状态 部分中,单击 待发票 以查看需要发送的租借订单。
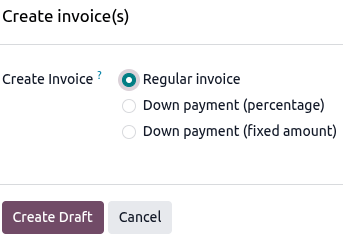
点击所需的租借订单,然后单击 创建发票 。从 创建发票(s) 窗口中选择 普通发票 ,然后单击
如果所有详细信息都正确,请单击 确认 并单击 发送 将发票发送给客户,或者单击
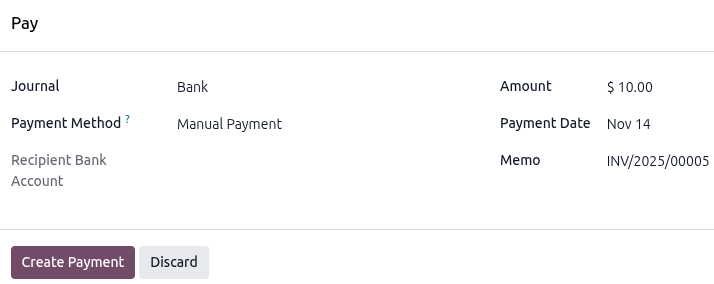
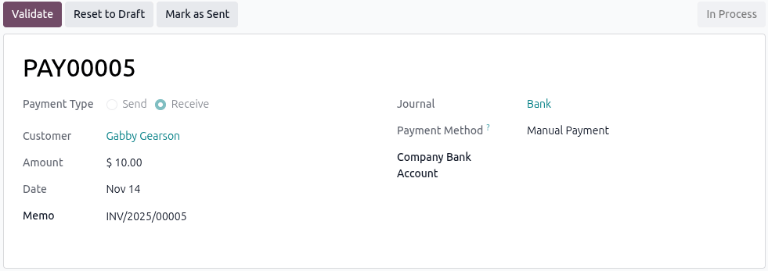
单击租借订单顶部的 支付 智能按钮,然后单击支付页面上的 验证 。
客户签名
Odoo有功能支持客户签署租借协议,在租借产品被取回之前,在租借产品之前。保证所有产品按时返回,并保持其原始状态。
Note
请求签名可以在任何阶段进行。此功能还需要 签署 应用。
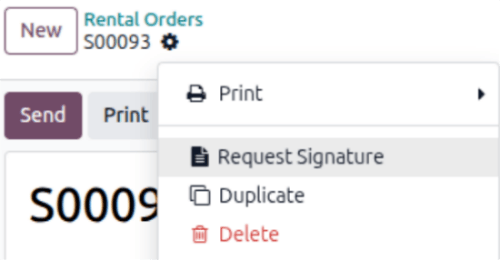
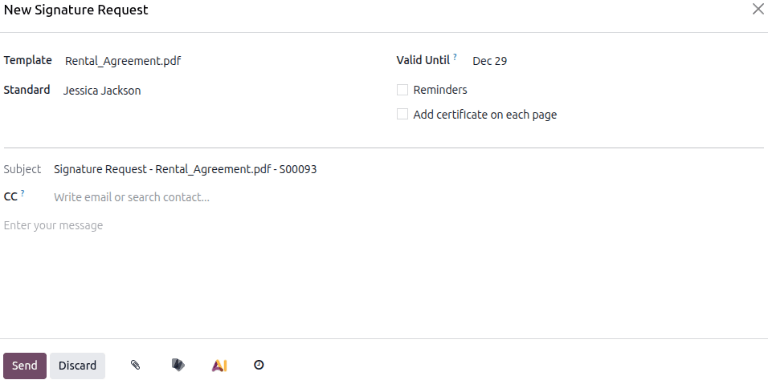
若要请求签名,请转到 租借 应用程序并转到 租借订单 仪表板,选择所需的租借订单。要转到 (操作) 图标,并单击 请求签名 。
签署文件弹窗将显示。从 模板 下拉菜单中选择所需的文件。

通过确认 新签名请求 窗体的信息,单击 发送 来启动签名过程。
记录的聊天器中将显示签名请求的链接。文档可以通过客户门户或电子邮件访问。
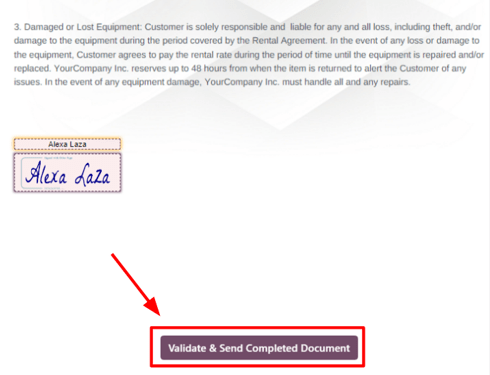
当客户单击 签署文件 时,将显示一个单独的页面,展示要签名的文件。客户首先点击 点击开始 开始过程。应用将指导签署人到所需的签名位置,并允许他们创建电子签名来完成表单。

文档已签名并完成,单击文档底部的 验证并发送完成文档 。Odoo 显示选项,下载签名的文档以进行记录,如果需要。
更多内容
多区位管理与仓库调拨
多区位agement和仓库调拨是重要的。 租借 应用程序有助于 租借调拨 功能。激活租借调拨意味着系统将租借活动与销售活动一样处理,每次租借或归还时都需要收據和出库单。
要管理多区位和租借物品的调拨,请转到 并在 租借 部分中,选中 租借调拨 复选框。
Note
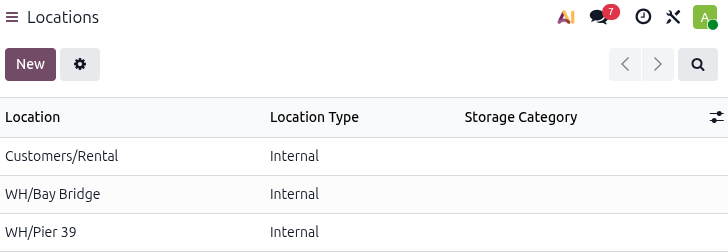
库存 应用程序会自动创建一个内部默认位置,一旦启用了租借调拨功能。Odoo 使用新的默认位置,客户/租借 ,来跟踪在租借期间(将产品从 库存 移动到 客户/租借 ,租借时,将产品返回时,将产品移动回 库存 )。不要修改,以免损坏库存跟踪。
转到 ,并在 仓库 部分中,选中 存储位置 复选框。点击 保存 来应用更改。
转到 ,点击 新建 来配置新的内部位置。
在创建新位置页面上,输入 位置名称 ,并确保 父位置 字段设置为 WH 。点击顶部附近的 手动保存 图标来保存。
Example
一个自行车租借公司有在同一城市中两个的商店位置。两个位置都允许客户取回和放置自行车。公司想在每个位置准确跟踪自行车。
请确保 租借 和 库存 应用已配置,在 租借 应用中启用 租借调拨 ,在 库存 应用中启用 存储位置 。
转到 ,创建每个商店位置的新位置。
提货
当客户提货时,转到相应的租借订单,点击 提货 。 租借 应用会显示一个仓库出库单,列出了已预订的租借产品。点击 验证 来将订单移动到 完成 阶段。
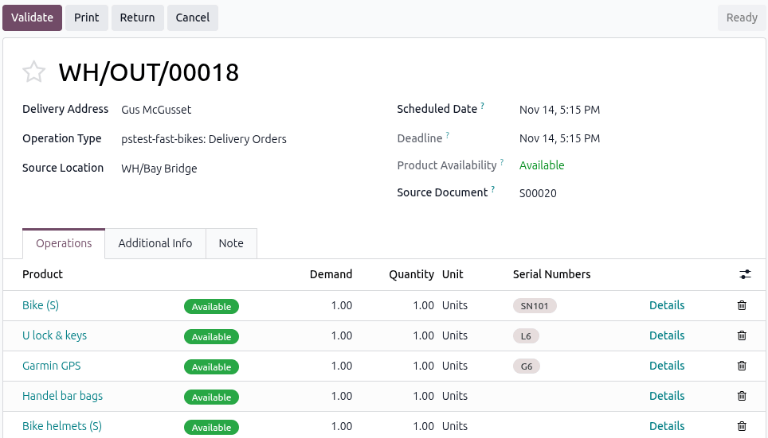
执行此操作,会在租借订单上显示 已取货 状态横幅。
归还产品
当客户归还产品时,转到所需的租借订单,点击 归还 。 租借 应用会显示一个仓库入库单,列出了已借出的租借产品。
输入客户归还的产品数量,在 数量 列中。如果有任何产品有序列号,请将它们输入到 序列号 列中。
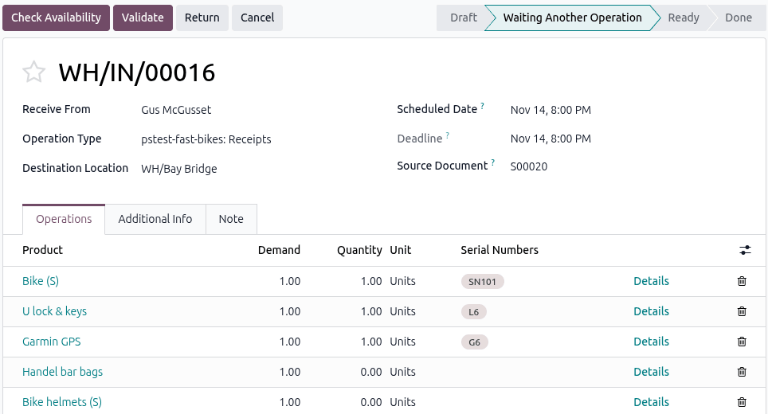
点击 验证 来将订单移动到 完成 阶段。租借订单上显示 已归还 状态横幅。
打印提货和归还单据
当客户提货和/或归还产品时,可以打印提货和归还单据。
转到所需的租借订单,点击 (操作) 图标以显示下拉菜单。
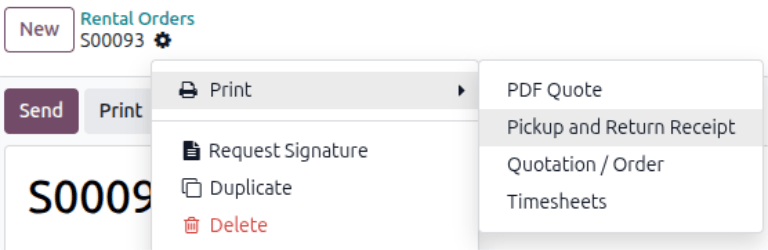
在下拉菜单中,将鼠标悬停在 打印 选项上,显示一个子菜单。然后选择 取货和退货收据 。
Odoo 生成并下载一个 PDF,详细描述当前租赁项目的所有信息。
