餐饮外卖
UrbanPiper is an order management system that integrates with multiple food delivery platforms. It consolidates orders from all connected platforms into a single interface, simplifying the delivery process.
支持的提供商:
配置
先决条件
To use the UrbanPiper integration in a live production environment, ensure the following requirements are satisfied:
UrbanPiper subscription: A valid UrbanPiper subscription is mandatory.
Note
For any concerns or queries regarding your UrbanPiper subscription, please reach out to the account manager linked to your Odoo database.
Odoo requirements:
Odoo 订阅: 需要有效的 Odoo 企业订阅。Odoo 社区版不支持此整合。
Odoo 版本: Odoo 企业版 18.0 或以上版本。
Odoo 平台: 支持所有 Odoo 平台,包括 Odoo 在线、Odoo.sh 和内部安装。
外卖平台经销商账户: 每个要整合的外卖平台(如 Uber Eats、DoorDash、Careem、Deliveroo、Zomato)都需要一个注册经销商账户。
UrbanPiper credentials
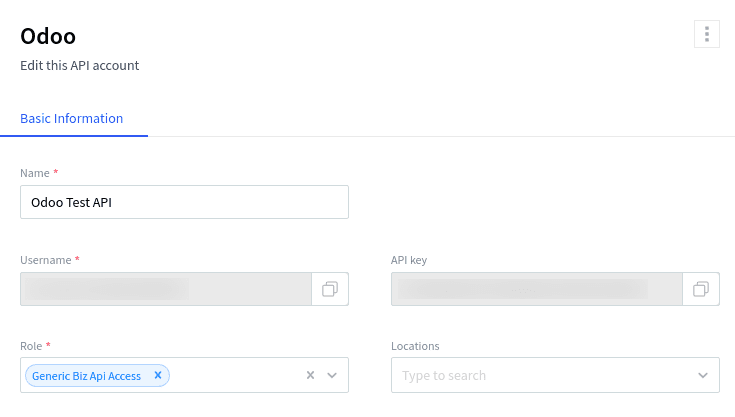
获取您的Atlas凭据
转到 :ref:`POS 设置 ` 。
向下滚动到 食品配送连接器 部分。
点击 填写此表单以获取用户名和 API 密钥 并填写调查问卷。
前往您的 Atlas 账户,并通过导航到 来获取您的 API 密钥和用户名。
门店收银
启用 Urban Piper 设置:
转到 :ref:`POS 设置 ` 。
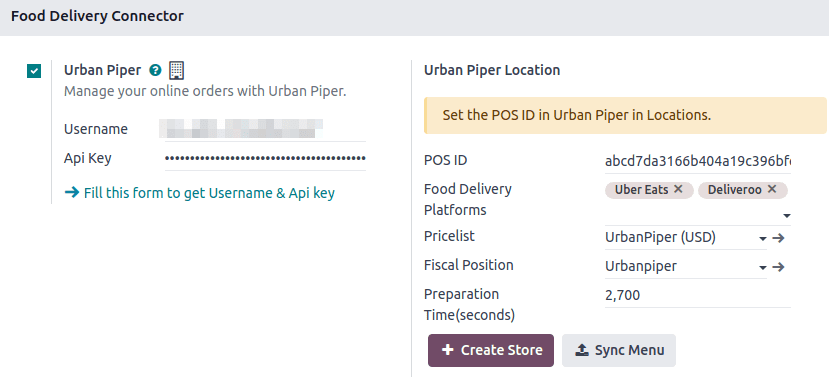
向下滚动到 食品配送连接器 部分。
检查 Urban Piper 设置。
设置 UrbanPiper:
使用您的 UrbanPiper 凭据 ` 填写 :guilabel:`用户名 和 API 密钥 字段。
在 Urban Piper 位置 部分的 食品配送平台 字段中选择所需的配送提供商(例如,Zomato、Uber Eats)。
保存设置。
点击 + 创建店铺 按钮。这样做会在 UrbanPiper Atlas 平台上创建一个新的位置。
Note
价格表 和 税务规则 字段在保存后会自动选择。
成功创建店铺后,会触发一个通知。
店铺创建过程可能需要2-3分钟才能在 UrbanPiper Atlas 平台上反映更改。
店铺会自动以您的销售点名称命名.
Store timings
Configure the store timings to define when the delivery services are available:
Navigate to .
Add a new timing record by clicking New to add a line, or edit an existing line.
Fill in the Week Day, Starting Hour, Ending Hour, and Point of Sale associated with this timing columns.
产品
要使产品单独可用,
Go to .
选择任何产品以打开其产品表单。
转到 销售点 选项卡。
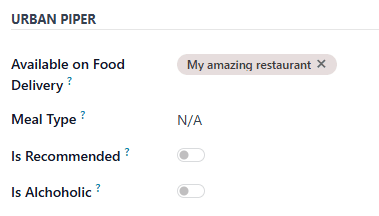
完成 Urban Piper 部分:
在 可用的食品配送 中填写所需的销售点。
可选地,设置 餐类型 字段,并启用 推荐 和 含酒精 按钮。
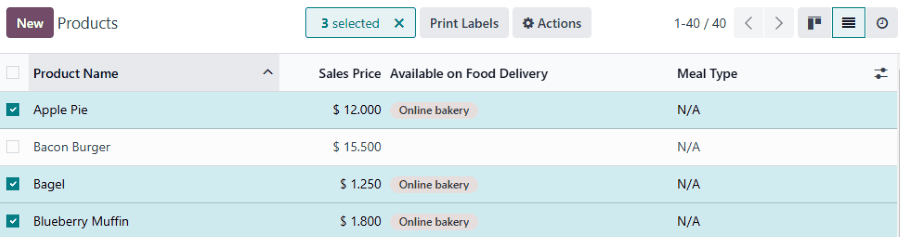
一次性使多个产品可用于食品配送
Go to .
点击列表图标 () 切换到列表视图。
选择产品。
在 可用于食品配送 列中输入所需的 POS。
Note
目前,UrbanPiper 不支持组合产品。
作为变通方法,创建一个产品并将组合选项定义为 属性与变体 。
同步
要使产品在食品配送平台上可用,请与您的 UrbanPiper 账户同步:
转到 :ref:`POS 设置 ` 。
向下滚动到 食品配送连接器 部分。
点击 同步菜单 按钮。
创建店铺 和 同步菜单 按钮下方的 上次同步于 时间戳会更新。
Note
成功的同步会触发一个通知。
同步过程可能需要2-3分钟才能在UrbanPiper Atlas平台上反映更改。
上线
`转到您的Atlas帐户的“位置”选项卡 `
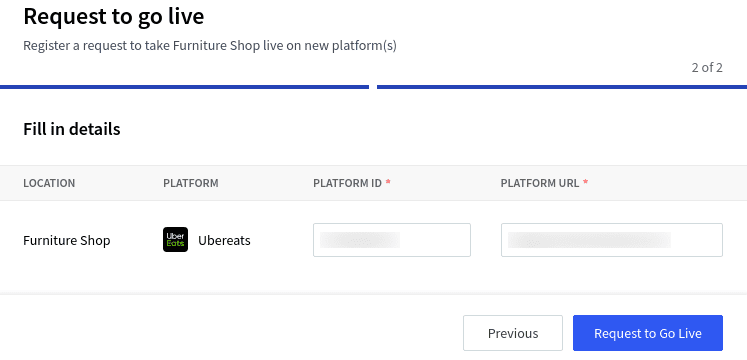
Select the location to activate, then click Request to go Live.

In the popup window:
Select the platform(s) to activate and click Next.
Enter the Platform ID and Platform URL in the corresponding fields to establish the connection between the platform and UrbanPiper.
Click the Request to Go Live button.
Note
To find the location’s Platform ID and Platform URL,
Click the location to open its setup form.
The location’s parameters are available in the HUB tab.
Verify that your location is live:
`转到您的Atlas帐户的“位置”选项卡 `
Select any provider in the Assoc. platform(s) column to review the status of that platform for this location.
Order flow
An order placed via the configured delivery platform triggers a notification. To manage these orders, open the orders’ list view by:
Clicking Review Orders on the notification popup.
Clicking the bag-shaped icon for online orders and New.
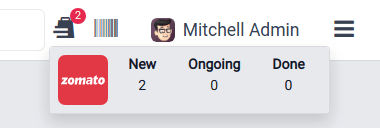
Note
Clicking this icon displays the number of orders at each stage: New, Ongoing, and Done.
The New button indicates newly placed orders, Ongoing is for accepted orders, and Done is for orders ready to be delivered.
Then,
Select the desired order.
Click the Accept button.
When an order is accepted, its Order Status switches from Placed to Acknowledged and is automatically displayed on the preparation display.
When the order is ready,
Open the orders’ list view.
Select the order.
Click the Mark as ready button. Its Order Status switches from Acknowledged to Food Ready, and its Status switches from Ongoing to Paid.
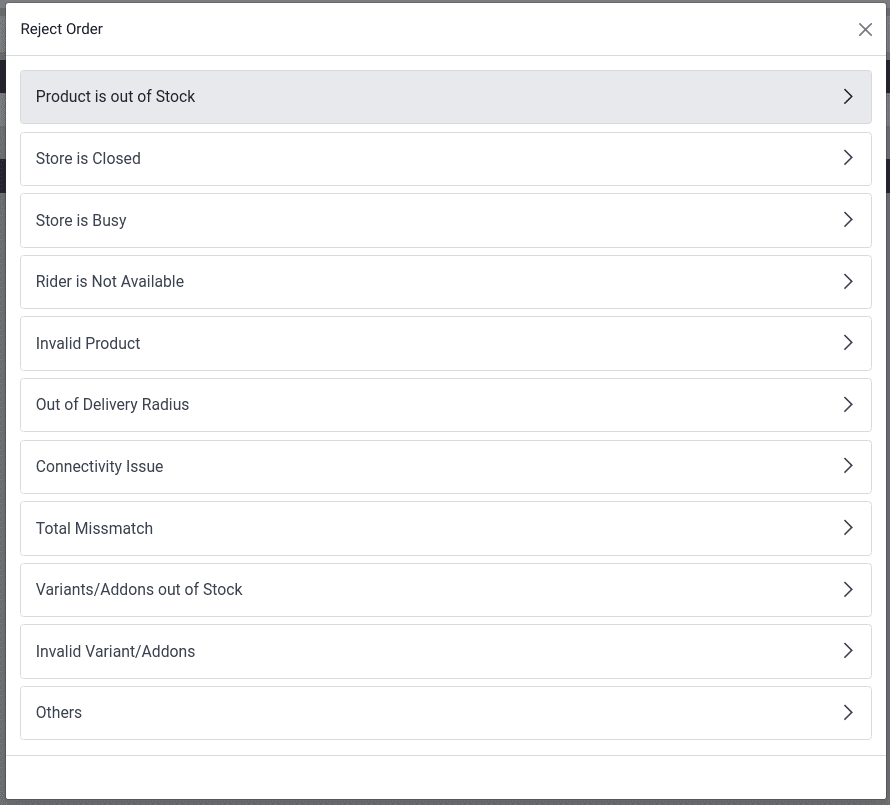
Order rejection
Sometimes, the shop or restaurant may want to reject an order. In this case, open the orders’ list view,
Select the desired order.
Click the Reject button.
Select one of the reasons from the popup window.
Important
Swiggy orders cannot be directly rejected. Attempting to reject one prompts Swiggy customer support to contact the restaurant. Similarly, Deliveroo, JustEat, and HungerStation do not allow order rejection. Always follow the respective provider’s guidelines for handling such cases.
