批量调拨
批量调拨使单个拣货员可以一次处理多个订单,减少了前往仓库位置的次数。在批量拣货时,订单会被分组并合并到一个拣货清单中。拣货完成后,批次会被带到出货区位,在那里将产品分类到各自的订单发货包裹中。
由于订单在分拣后 必须 在出货区位进行分类,因此这种分拣方法适合经常订购少量产品的企业,即订单多、每单货量少的企业。将需求量大的产品存放在容易到达的地点,可以提高订单的完成效率。
批量调拨/拣货也适用于处理订单量大且需求稳定的行业或仓库。这种方法通过允许工人在一次穿过仓库的过程中为多个订单拣选物品,从而提高效率,减少行走时间并提高生产力。
配置
要激活批量拣货选项,请首先转到 。在 操作 部分,勾选 批量、波次和集群调拨 选项框。
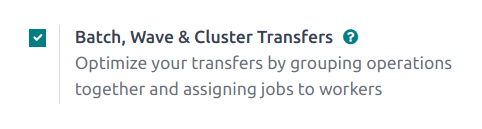
由于批量拣货是优化 Odoo 中 拣货 操作的一种方法,在 仓库 标题下的 多区位存储 和 多步补货路线 选项也必须在此设置页面中勾选。完成后,点击 保存 。

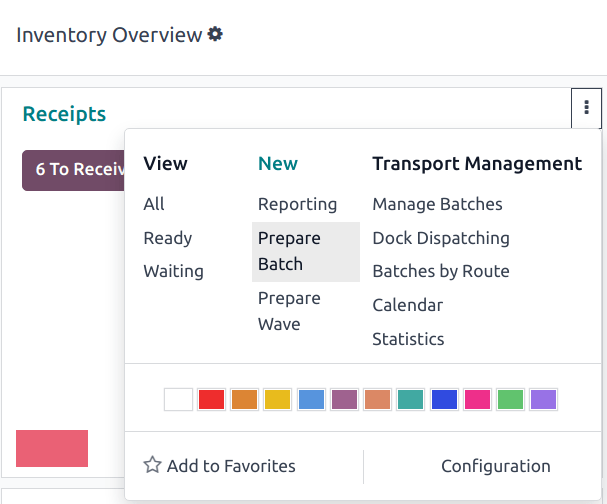
创建批量调拨
要手动进行对拣货分组,可以直接从 中将鼠标悬停在 库存概览 菜单中的所需操作类型上(例如 收货 看板卡片),点击 (垂直省略号) 图标,然后选择 批量安排 。
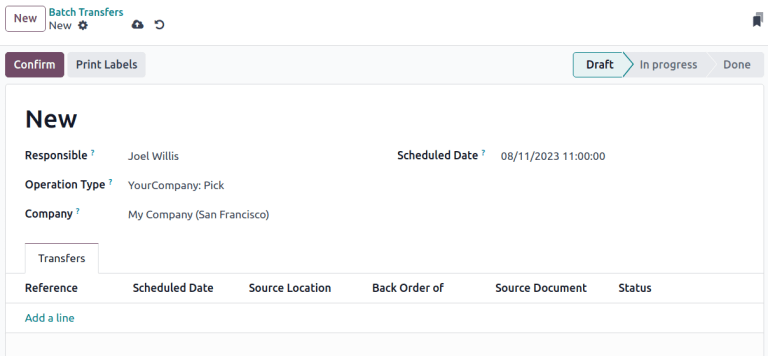
On the batch transfer form, fill the following fields out accordingly:
Responsible: employee assigned to the picking. Leave this field blank if any worker can fulfill this picking.
Operation Type: from the drop-down menu, select the operation type under which the picking is categorized.
Scheduled Date: specifies the date by which the Responsible person should complete the transfer to the output location.
更多内容
To learn more about the Dock Location, Vehicle, and Vehicle Category fields, see dispatch management system.
Next, in the Transfers list, click Add a line to open the Add: Transfers window.
If the Operation Type field was filled, the list will filter transfer records matching the selected Operation Type.
Click the New button to create a new transfer.
Once the transfer records are selected, click Confirm to confirm the batch picking.
Example
A new batch transfer is assigned to the Responsible, Joel Willis, for the Pick
Operation Type. The Scheduled Date is set to August 11.
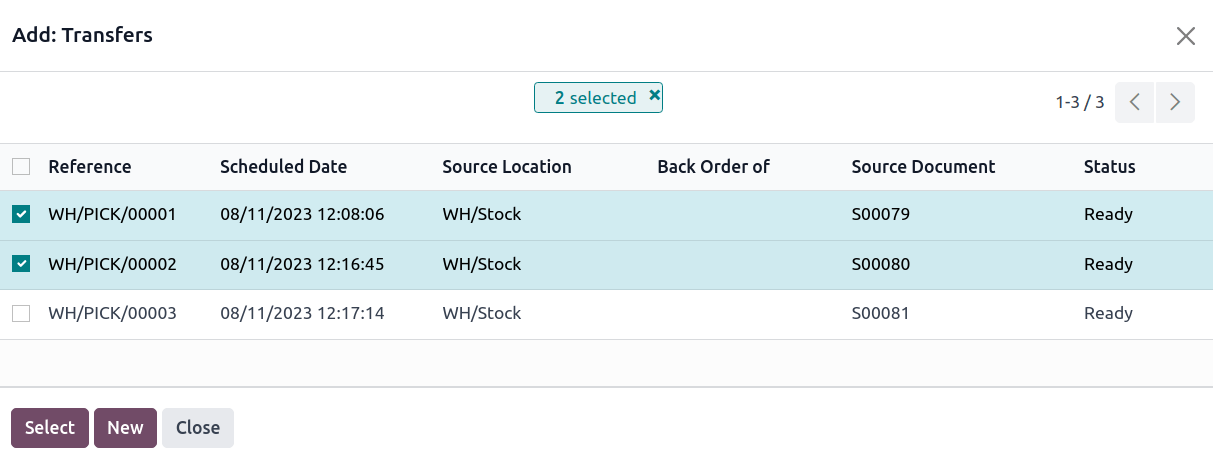
Clicking the Add a line button opens the Add:Transfers window,
displaying only pickings. This is because the Operation Type was set to Pick on the
batch transfer form.
Click the checkbox to the left of the transfers, WH/PICK/00001 and WH/PICK/00002, to include
them in the new transfer. Then, click the Select button to close the
Add:Transfers window.
Add batch from transfers list
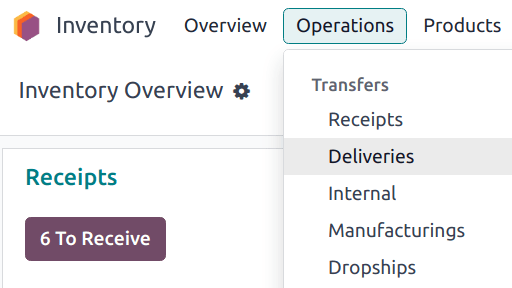
Another method of creating batch transfers is available using the Add to batch option in a list. Navigate to the drop-down menu, and select any of the Transfers to open a filtered list of transfers.
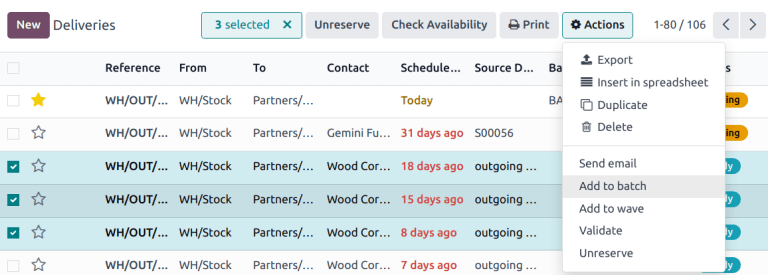
On the transfers list, select the checkbox to the left of the selected transfers to add in a batch. Next, navigate to the Actions button, and click Add to batch from the resulting drop-down menu.
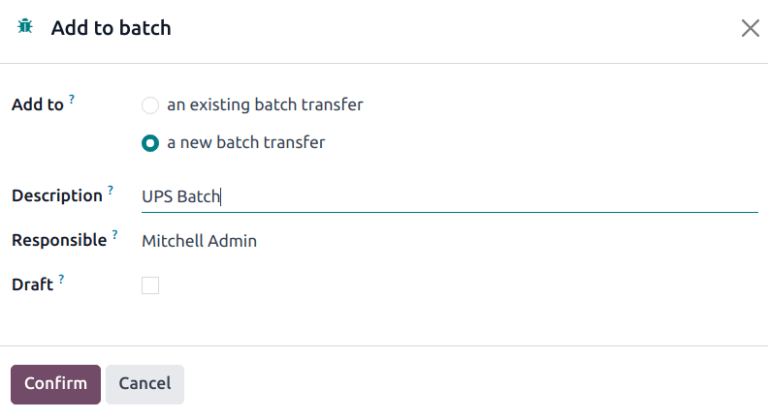
Doing so opens an Add to batch pop-up window, wherein the employee Responsible for the picking can be assigned.
Choose from the two radio options to add to an existing batch transfer or create a new batch transfer.
Add a Description for this batch.
小技巧
The Description field can be used to add additional information to help workers identify the source of the batch, where to place the batch, what shipping containers to use, etc.
To create a batch to be processed at a later time, select the Draft checkbox.
Conclude the process by clicking Confirm.
Automatic batches
Batches can be automatically created and assigned based on several criteria. The Automatic Batches option is defined on the operation type level.
Example
In a multi-steps delivery process, the picking operation can be grouped by customer, while the shipping operation can be organized by carrier and destination country.
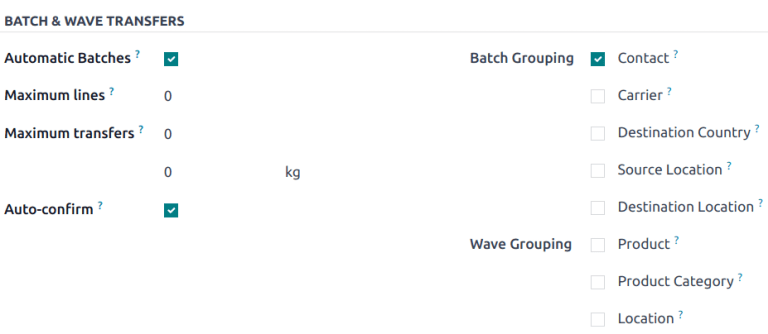
To enable Automatic Batches, navigate to , and select the desired operation type (e.g. Delivery, Pick, etc). Then, select one or more Batch Grouping criteria by ticking the appropriate checkbox. Even if more than one grouping option is selected, only one batch is created.
Batches can be automatically generated based on the following criteria:
Contact
Carrier
Destination Country
Source Location
Destination Location
处理批量调拨
在 页面处理批量调拨。
在此处,从列表中选择要调拨的产品。然后,在批量调拨表单的 已完成 选项卡下输入每个产品的 详细操作 数量。最后,选择 验证 以完成拣选。
小技巧
当 验证 按钮突出显示为紫色时,请确定批次调拨已完成。如果 查看可用性 按钮高亮显示,则表示批次中有些项目目前**无**库存。
Example
In a batch transfer involving products from pickings, WH/PICK/00001 and WH/PICK/00002, the
Detailed Operations tab shows that the product, Cabinet with Doors, has been picked
because the Done column matches the value in the Reserved column.
However, 0.00 quantities have been picked for the other product, Cable Management Box.
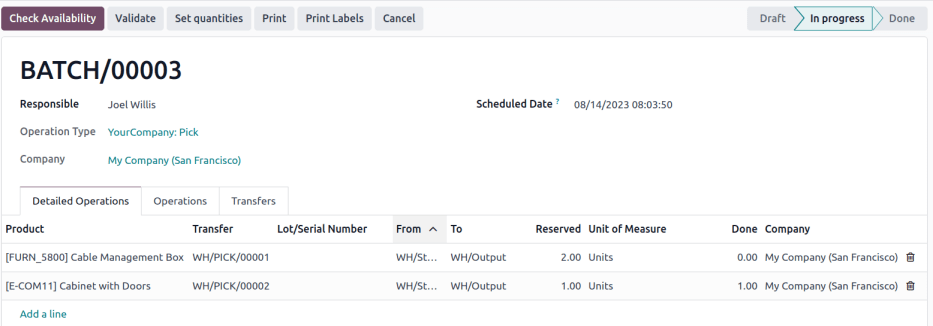
Only in-stock products are visible in the Detailed Operations tab.
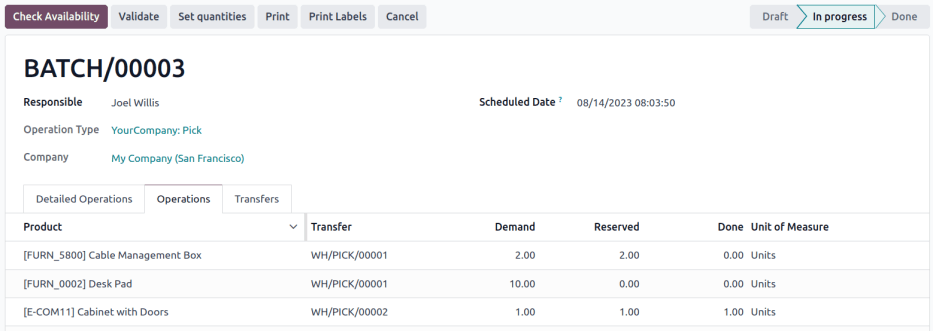
要查看完整的产品列表,请切换到 操作 选项卡。在此列表中, 需求`列显示订单所需数量。:guilabel:`保留 列显示完成订单的可用库存。最后, :guilabel:`已完成`列说明已拣选并准备好进行下一步的产品。
Example
The product, Desk Pad, from the same batch as the example above, is only visible in the Operations
tab because there are no Reserved quantities in stock to fulfill the batch transfer.
Click the Check Availability button to search the stock again for available products.
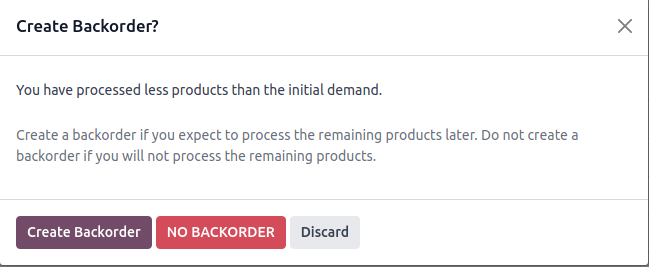
创建欠单
在批次调拨表单中,如果产品的 完成 数量 少于 预留 数量,将会出现一个弹出窗口。
此弹出窗口提供了选项:创建欠单? 。
点击 创建欠单 按钮会自动创建一个新的批量调拨。
注解
在创建新的欠单时,批量调拨中 未验证 的作业将被从中移除。
点击 不创建欠单 将完成拣货任务,而 不创建 另一个批量调拨。
点击 放弃 取消验证,并返回到批次调拨表单。